Camper Modifications
As much as we love the Wolf Pup (aka the ‘Gray Ghost’), there are some things that we tweaked…
* Added recently
Bed Lifter Upgrade
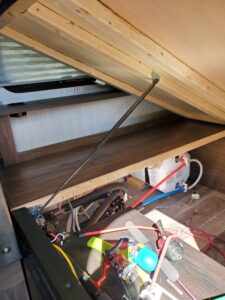
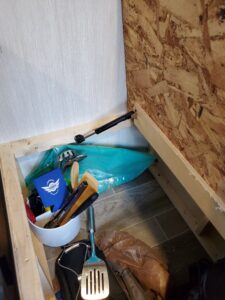
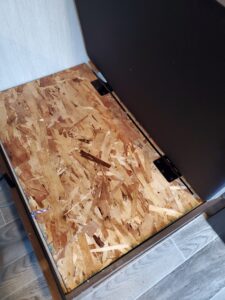
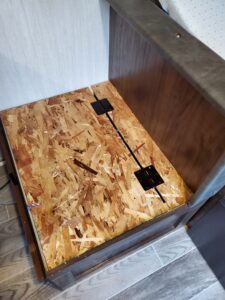
The mattress topper makes the bed considerably heavier, which means the original gas strut lifters aren’t quite strong enough, so I replace them with these. The originals have 65lbs of force, while these new ones have 100lbs. They fit directly in the mounts of the originals, but you need to compress them slightly to get them in… not easy at 100lbs.
Mattress Upgrade
Even though the Black Label edition has an upgraded mattress, it’s still pretty thin. So, we added a memory foam mattress topper. This makes the thin mattress a bit thicker, but as a side-sleeper, it wasn’t quite enough.
After two seasons on the original mattress with a topper, I decided to upgrade the mattress. Frankly, I saw an ad for rvmattress.com right after I got back from a trip in the camper, and my back was a bit sore from the camper bed, so I started looking at new mattresses. The reviews for rvmattress.com looked good (thier stuff is made by Brooklyn Bedding), they have good options, and the prices were reasonable.
We ended up going with the “Brooklyn Arctic Dreams” model. We haven’t taken a trip with it yet, but just from laying on it for a few minutes, it feels just like a regular bed, and no longer like and “RV bed”. (more to come here after a few trips)
Update: After several trips I can say the mattress upgrade was probably some of the best spent $$. If you care about a truly comfortable mattress in your camper/RV, you won’t go wrong with the mattresses from Brooklyn Bedding (I have no association with them, just a happy customer).
Under Bed Storage
This is one of my favorite mods. Most of the stuff listed here is pretty straight forward “replace this with that”, “just order this and bolt it on”, or you can find three YouTube videos showing you what to do. Not this one.
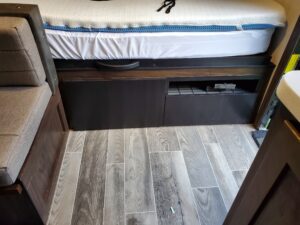
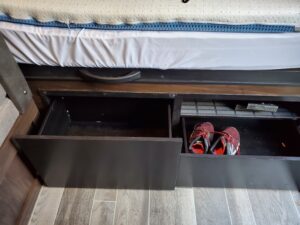
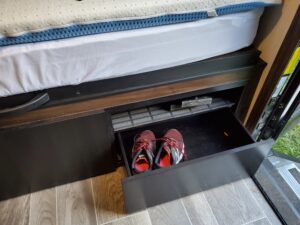
It started out as a place to put shoes. Mostly because the family would come in for the night, and everyone would leave their shoes in front of the door in case they were needed for a bathroom break while half asleep. After tripping over the shoes a few times, I started looking for a new place for them. My original thought was to knock out the side panel on one of the dining table bench seats and make a cubby under there. But we already use that space for other things. Then I realized that the storage space under the bed is huge. And while we do store things under there (chairs, screen tent, etc), there was still plenty of room.
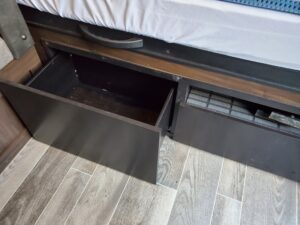
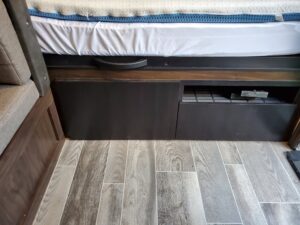
At this point we’d had the Gray Ghost for just about a year. So, it wasn’t brand new, but it’s still in pretty nice shape. So, what ever modification I did had to look decent. I’m “handy”, but not a great woodworker. So I started looking for some existing storage unit that was the right size and color for the task… Ikea to the rescue! Ikea has a dark brown TV stand called the “BESTÅ” . It was exactly the right height and length, and you can choose the shelves, and/or drawers to put in it. The dark brown (the same “Espresso” dark brown Ikea uses for everything) matched the interior of the camper enough so it doesn’t stand out, and almost looks original.
I decided to set it up with one shelf and a short drawer on one side, and a deeper drawer on the other. But the internal configuration is easy to change (and you buy all those parts separately. The shelf is perfect for flip-flops, and sneakers. And so it the short drawer. So far we’ve used the deeper one for beverage storage.
Honestly, the hardest part was finding the right piece of furniture to put in there. Once I got it home (and assembled it), the next step was to remove the “paneling” on the side of the bed (see the first photo, below). This is all attached with little staples, so with the bed lifted it was easy enough to push it out from the back. With the paneling off, I had to remove a bed frame support in the middle of the area I was going to put the storage unit in. I probably could have relied on the storage unit carrying the weight (it’s pretty solid) but I also put new supports in either side of the storage unit.
With the “framing” in place, I layed the paneling on the ground (face down) and put the storage unit (also face down) on top of it. I traced the unit onto the back of the paneling and very slowly/carefully cut out the hole with a jig saw. Once I was sure the cut out would fit around the storage unit, I put the unit in the camper. Next I put the paneling in place, dry-fitting it all. A little trimming, and a tiny shim under the storage unit, and the fit came out even better than I expected. I put a few tiny nails in the paneling to hold it in place, then drove a few long screws through the floor of the storage unit into the floor. And a few through the bed frame into the top of the storage unit. Then a few more nails into the paneling, and… done!
Bedside Cup Holders
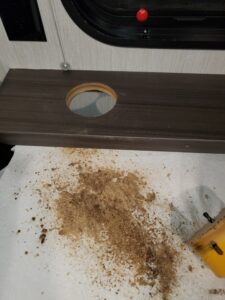
This is another easy mod, but you need to be brave enough to cut very visible holes in your camper…
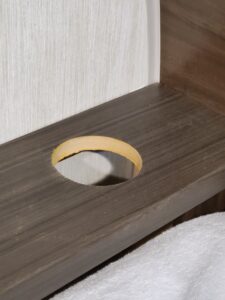
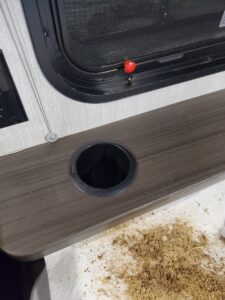
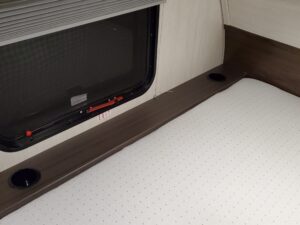
When relaxing on the bed, the headboard/shelf at the head of the bed is the only place to rest anything. But resting beverages here is a bit risky. So we decided to add some cup holders here.
I found these cup holder inserts on Amazon. The color matches the camper perfectly, and they’re big enough to hold a beverage in a koozie.
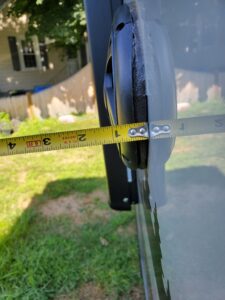
Installation is easy. Find a 3-1/2″ hole saw, and cut a hole. These inserts require a little pressure to get in place. But the snug is actually perfect to keep them in place.
Quieter Water Pump
The factory water pump isn’t really loud, but it feels like it when you’re running the water late at night. It was a low rumble that felt like it was going to wake everyone in the campground. I considered upgrading the pump, but decided to try some vibration dampening first. I had a scrap of rubber-backed plastic carpet that I inserted between the pump and the camper floor. I tested the results with a sound level meter app on my phone. Before any mods, the pump registered at about 58db with the phone on the floor next to the pump. With the carpet dampener, it went down to 55db. But I felt like I could do better
So I ordered an accumulator tank made specifically for RVs and bought some flexible pipe insulation. The accumulator tank install requires another supply line like this one and is pretty straight forward.
With all these mods in place, the sound from the pump dropped to 48db, and with the “hatch” closed, you can just barely tell the pump is running. Its not silent, but its considerably better.
12v Power Outlets (internal)
I’d been thinking about adding a 12 volt power outlet (a “cigarette lighter” style jack) for a while. I wasn’t sure what I’d use it for (there are USB jacks all over the place) but I knew some day the need would come. And it did.
When it became clear that working from home was a long-term thing during the summer of 2020, Maddox tried to book as many campsites as possible. My company’s vacation policy is pretty great, but it was clear that I’d have to work on some of these trips. I’m fortunate that I can work just about anywhere with a laptop, and internet. But as we started looking at longer trips I needed a way to charge the laptop. See the Macbook Charger I use on the road, below. And this thing can pull a fair amount of power, and be plugged in for a while, so I needed an outlet up to the task (lots of stories of cheap sockets melting out there).
With this mod I had a few concerns… primarily not killing the battery, and not starting a fire.
I thought about putting some sort of battery alarm in, but the camper came with a voltmeter gauge built-in, and it does a good job of letting me know the state of the battery. I tend to watch it closely when I’m using the battery a lot. And worst case I bring spare batteries and can recharge via the solar setup.
The “not starting a fire” requirement primarily meant the components had to be up to the task, and a little protection needed to be installed.
For the outlet, a quick search revealed that just about every outlet on Amazon has at least one reviewer talking about the outlet overheating and melting. But I found this one with an all-metal body, and a fair amount of air-space around it to keep it cool.
Next up was the wire. I really just wanted to make sure that, like the outlet, the wiring was up to the task. Primarily meaning weather-proof, and thick enough to keep cool under load. For cost and performance, I ended up using outdoor rated 12-2 wire from the big-box hardware store. The wire is only 10 feet long, and even if the laptop charger is pulling the full 90W it’s capable of, that’s no where near the capacity of the wire. While the wire is outdoor rated, where exposed to the elements it’s also tucked into the existing wireloom.
Lastly, since this thing is directly connected to the battery, I wanted to include some short protection. I opted for this auto-reset 12V circuit breaker. This is the same style of protection used by the RV manufacturer. It will protect the circuit, and I won’t need to replace a fuse if I do overload it.
Wiring this up was pretty straight forward. The existing breaker and an electrical box are located right behind the battery on the back of a frame rail. The battery cable from the battery to the hot side of the existing breaker is a standard car battery cable, and certainly up to the load I’m adding to it. I used the “hot” terminal of the existing circuit breaker to tap into the power, and ran a little “jumper” to the new/additional breaker, which I put inside this conveniently located electrical box for a bit of extra weather protection. There was an existing ground screw inside there as well which made that easy. Added my 12-2 cable to the other end of the new breaker, ran it out of the electrical box, along the frame, and up inside the cabin through an existing plumbing hole. I sealed the hole with “great stuff” (basically what it was originally sealed with), and then I had my fault-protected hot wire inside the cabin.
For esthetics, and ease, I mounted the outlet under the bed as well, to the back side of the storage unit I installed. It’s out of the way, but easily accessible.
Interior Light Dimmers
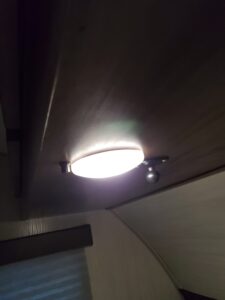
The interior lights in the Wolf Pup are the fairly standard LED puck lights. And these things are bright. This is great until people start going to sleep and you want it sort of (but not completely) dark.
So, my first thought was to replace all the lights with something likes this.. I had two concerns with these… First, I was concerned that, at $13 each, I’d need to spend over $50 to upgrade the lights I wanted to dim (the two main lights, the one over the dining table, and the one over the big bed). The second concern was the electronic dimmer. To dim those lights you hold the switch until the dim to the level you like. I was thinking about turning on a previously dimmed light and having it come on at full brightness if it didn’t “remember” the previous dimming setting.
FWIW, I tried one of these lights and the dimmer works the way it should. When you turn the light off and on again, it comes back on at the previous setting. However, I got one of the “cool white” versions, and it was definitely cooler than the rest of the lights in the camper. If I was going to go this route, I’d try the “warm white” version.
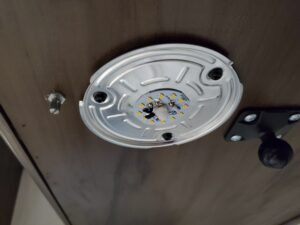
While looking for dimmable LED pucks I came across these dimmers. From the pics and dimensions, it was clear that the boxes these things come in were way to big to make the useful as-is. But others, in reviews, talked about taking the dimmers out of the box and using them “raw”. And at $10 for 3 of them it was worth a try. My thought was to install one of these over the main bed, one over and dining table, and one in-line with the motion sensor and switch that controls the ceiling lights. And the thought of a physical knob to dim the lights, instead of holding a button, appealed to me.
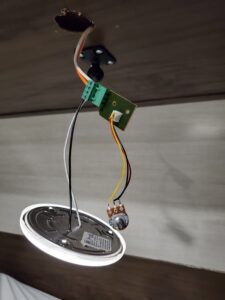
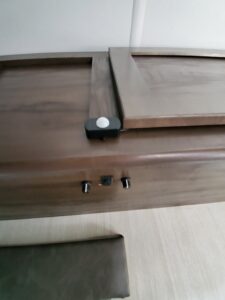
So, I went for the 3-pack, and I spliced them inline with the power to each light. Two of the installations were for lights in the bottom of cabinets (over the table and over the bed). These cabinets have a “false bottom”, the bottom of the inside space and the outer bottom of the cabinet are two separate pieces and there’s about a 3/4″ gap between them. This space is a perfect place for the dimmer circuit board, and a good place to mount the dimming knob.
With this mod complete, I’m really happy. The dimmers perform really well, and stock LEDs are surprisingly dimmable. The lights stay on the last dimming setting, and are very easy to adjust. And at $3/dimmer, it was cheap 🙂
In the pictures below you can see wiring of the dimmer over the bed, the dimmer knob installed over the bed, and the two other dimmer switches (one for the dining table light, and one for the two main ceiling lights).
Underseat Door Lifter
This is very similar to the overhead cabinet door lifter mod. But instead of holding cabinet doors open, struts are used to hold the lid to the under- seat storage open.
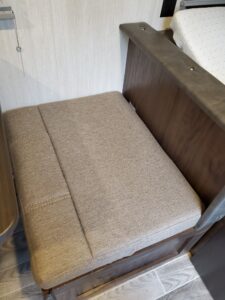
Here I used 4.5lb, 8″ struts. You can just slap these on, but I wanted to make it so you didn’t need to remove the seat cushion, which required cutting and hinging the storage “lid” a few inches from the back edge. A loop of thin rope through a hole in the lid serves as a “handle” to make lifting the lead easier.
This mod makes this storage space a lot more usable. We typically store food in reusable grocery bags (fit perfectly) and the kitchen utensil “jar” here during travel.
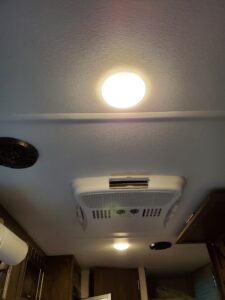
Motion Activated Ceiling Lights
This is another of my favorites. More often than not, we’re camping on batteries. And while we do have 4 of them, we try to make each one last. So, that means turning off lights when we’re not using them. This mod not only turns off the lights when we’re out of the camper (common during dinner prep, for example), but it also turns them on “hands-free” when we enter.
The key is a relatively cheap little 12V motion sensor switch, and a little creative wiring. At a minimum, I wanted the two main ceiling lights to be controlled by the motion sensor. Not knowing exactly how the lights were wired, I started by removing the ceiling light closest to the power center (located) under the fridge. When I pulled the light from the ceiling, it was clear that the power came into the light, and then went on somewhere else. The only way I could think of to figure out what else was powered by this wire was to cut it, and see what stopped working, which is what I did. I was hoping all the lights in the camper would go out (and everything else would remain powered), but just the other ceiling light went out. That was good enough.
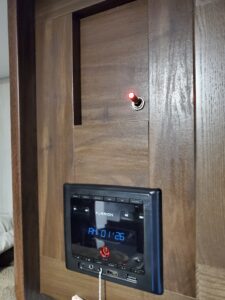
This light is located right in front of the stereo head unit mounted in the overhead storage. This was convenient because I wanted to mount the motion sensor on that cabinet, right in front of the entry door. So, I spliced in a long loop of wire where I’d cut the power supply to the lights, and was able to fish it through the ceiling and drop it into the cabinet where the speaker wires ran from the head unit to the speakers (also in the ceiling). With the “switch” wire in the cabinet, it was easy to staple it along the upper, inside of the front of the cabinet to get the wires opposite the door.
When I ordered the motion sensor, I also picked up some of these barrel power plug pigtails. These allow me to plug the motion sensor “in line” in the power supply to the ceiling lights. It also allows me to easily remove the motion sensor and just plug the one end of the spliced-in wire into the other end, basically repairing the circuit I spliced and returning normal operation. And that’s actually how things are right now. Once I find a SPDT switch that matches the ones already in the camper (probably something like this, but SPDT) then I’ll use the switch to override the motion sensor, making the lights work “normally”. These ceiling lights have a built-in button switch that still operates and could confuse the whole thing a bit. If the lights, themselves, are switched off, it won’t matter if the motion sensor sends them power. I may try to find an “On/Off/On” switch (and superglue the buttons on the lights in the “On” position). Then I’d have a “wall” switch that could toggle between “Off”, “On”, and “Motion Sensor”.
Also, I read some less-than-great reviews of the motion sensor but its worked perfectly for us. You can adjust the sensitivity (to motion), and we’ve got ours set to it can detect you as you step up to the screen door from the outside. Literally, you hit the steps and the lights come on!
You can also adjust the amount of time the lights stay on after the last motion was detected. So, ours stay on for about 5 min, then go off. But if you keep moving (or move at least once every 5 min) they stay on. Exactly what we wanted.
Mod to the mod…
The original installation worked, but it was a pain to switch between the lights being motion controlled, and not. It was possible to unplug the barrel connectors and remove the motion sensor from the circuit, but that isn’t very user-friendly.
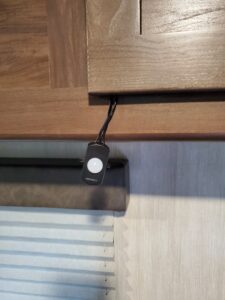
So, I added a 3-position switch just under the motion sensor (see pics, below). This switch made it easy to choose between “on”, “off”, and “motion controlled”.
Subwoofer
Maddox teases me and says I add a subwoofer to everything. All this because I added a weather-proof 12″ sub to our deck sound system! (And it sounds amazing , btw). Anyway…
So, even after the upgrade of the interior speakers in the Wolf Pup, there was still very little low end. Again, we’re not cranking music for the entire campground. But, I like decent sound, even at very low volumes. So, I added a small sub to the camper.
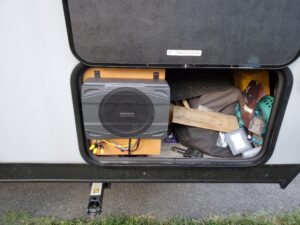
I wanted to keep the install simple, and I didn’t need much power, and I certainly didn’t want something that would drain the camper’s batteries. So, after a bit of research I decided to go with this little 8″ active sub from Rockville. The size, cost, and power were perfect for my needs. It also has an auto on/off feature which I thought I would use. But, ultimately I decided that I wanted to be able to turn the sub off even when listening to music (for example, late at night). So I ended up putting in a toggle switch to control power to the sub. The switch lights up when the sub is on as an extra reminder to turn it off during quiet hours or when not in use.
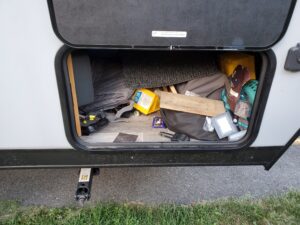
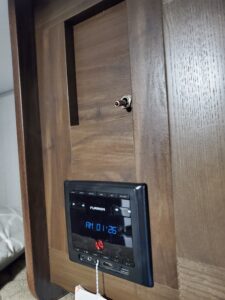
Installation was pretty easy. I ran power and signal from the back of the Furion head unit to the sub, which I located under the bed right by the access hatch. Finding a signal for the sub was easy as the head unit has an unused subwoofer output. I mounted the sub on a hinged piece of wood just inside the exterior access hatch for the under-bed storage. The idea is that it’s tucked away, pointing into the camper most of the time. But if we ever do want to use the sub with the external speakers, we can simply open the exterior hatch, and swing the sub into the opening.
I don’t use it as much as I thought I would. Again, we work hard not to disturb other campers. But, when I do use it, it makes a world of difference in the sound, even at low volumes.
Stabilizer Jack Replacements
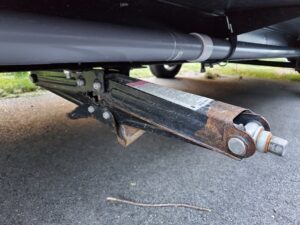
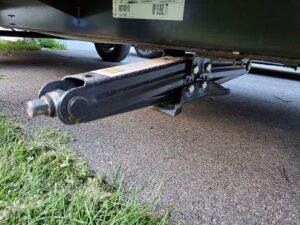
On our third or fourth trip with the Gray Ghost, I was backing it into a campsite in the dark. The ground was uneven, and I ended up catching the two front stabilizer jacks on the ground. While mostly still functional, they were bent up, tough to crank, and a lot of the paint flaked off (see the pics, below). I figured replacement would be straight forward, but given the price of a decent replacement, I decided to fix one first. I ordered this as a replacement. It’s definitely heavier-duty than the original. Installation wasn’t hard, but it didn’t just bolt right in in-place of the original. Two of the four mounting holes lined up, but I had to drill the other two. This jack didn’t come with mounting hardware, but I had a few grade-5 bolts just the right size laying around. Bolted it right in. And it’s definitely more solid than the original. At some point, I’ll replace the other less-bent one (done in 5/2021)
Kitchen Water Filter
For the first two years, we used a water pitcher that has a filter built in. We’d fill the pitcher and keep it in the fridge, and it worked fine. The filter makes a noticeable difference, even when drinking the water from home that’s been in the fresh-water tank for a few days.
So, after thinking about this a bit more, I decided to take it to the next level, and put a house in-line water filter on the cold-water line for the kitchen sink. They relatively easy to plumb, and this was all the drinking and cooking water we pour in the camper will taste great.
I use these typed of filters at home, so I’ve installed them before. Also, I learned its key to pick a system that uses standard size/shape filters. I ended up going with Installing the filter has two parts… mounting the filter holder, and the plumbing to put it inline for the cold water supply.
For the mounting, I mounted under the sink, close to the floor, ensuring there was enough space under the filter to allow me to change it. I used a stud-finder to find a stud, and mounted the filter holder into it.
For the plumbing, I had two options… work with PEX, or work with threaded hoses. This is because under the sink in my unit, the supply plumbing switched from PEX to threaded, braided stainless supply lines. I decided to work with the PEX because I had the tools, and the fittings are cheaper. I plumbed the filter in-line on the cold water supply line, but I also used some valves and a line in parallel to the filter to allow me to bypass the filter.
Spare Keys
I’m always losing keys, and we only had one set of keys for the camper (one for the main door, and a different key for the back “emergency” door by the bunks). After noticing the number on the keys, I realized I could probably just order pre-cut keys… and sure enough etrailer.com had the right keys for our locks. So, for $10 each, we now have backup keys.
I highly recommend having a backup key for at least one “main” door. Nothing will ruin a trip faster than getting locked out, and likely having to break-in to your own camper.
Cell Booster
NOTE: Some components mentioned here have been replaced. See New Cell Booster below for details.
Normally we go camping to “get away”. So, having poor or no connectivity is just fine. But, as I mentioned, over the summer of 2020 we had a lot of trips planned, and I needed to work through some of them. With the power outlet and laptop charger, the only other thing I need is a reliable cell/data signal. So, I started looking into cellphone boosters. After a little research, I learned a few things:
- These things are boosters. This means there needs to be some signal for them to boost. If there’s no signal, these are useless.
- You need to get one that works for your carrier(s). Different carriers (Verizon, T-Mobile, Sprint, etc) use different frequencies and bands. Some boosters only support one carrier, some support multiple, but I don’t believe any (affordable ones) support them all.
- These devices are basically two antennas with a booster in the middle. (This is over-simplified, but…) Think of it as one antenna (the external one) that pulls the signal in, and sends it to the booster box. The booster amplifies the signal, and rebroadcasts via the local antenna for your phone or hotspot to connect to.
- One major difference between models is the amount of space they can cover with the local (rebroadcasting) antenna. In short, how close do you need to stand to the antenna with your phone. As an example, for the brand I bought (not the model) local coverage of up to 6,000 sqft costs ~$550, And coverage for 10,000 sqft costs ~$700. Again, I didn’t buy either of these.
- Another major difference is how they “help” you point the antenna. Fancy ones have a display right on the booster. Cheaper ones use an app on your phone to help you find the best signal. Basic ones have an LED on the booster that indicates “ok” or not.
- The ones designed for mobile use an omni-directional antenna. This is an antenna that doesn’t have a front or back, and receives a signal equally well from any direction… but not necessarily “well”. The other type of antenna, the ones used by most non-mobile systems is directional, and must be pointed at the cell tower your boosting (not necessary with the omni-directional ones). This requires more work to set up, but directional antennas can pull in weaker signals than omni-directional ones. They’re used in non-mobile systems because, while they’re more work to set up (aim), you only have to do it once, and… they work better. Mobile systems are typically more expensive, and have shorter local range (because you’re usually in the car with the internal antenna).
- Most (all?) boosters require significant distance/separation between the antennas so that the receiving antenna doesn’t pick up the signal from the local antenna and create a feedback loop. The stronger the booster, the more separation required. And vertical separation is best (mounting the receiving one up high, like on a roof).
So, once I figured out the basics about how these things work, I made a few decisions. First, I was a bit skeptical that they would really solve my problem, so I wasn’t willing to dump a TON of money into the really high-end ones.
Next, I decided that to save money, and get better performance, I would buy one designed to be stationary (i.e. not mobile) and adapt it for my needs. This meant it would need to be able to run off 12V DC (or less), and I’d need to figure out how to making setup (aiming the antenna) relatively easy.
On that last note (making setup easy), that ruled out the cheapest models with the simple LED that helps you aim.
I ended up getting the HiBoost Dot. I chose this one because:
- It supported Verizon and T-Mobile (my carrier and Maddox’s) to maximize our chance of being able to find a signal that worked for at least one of us.
- It connects to an app on your phone via bluetooth to help you aim the exterior antenna. Way more helpful than a green LED. Reviews were solid.
- Price was ok.
- Part of the reason it was on the cheaper end (for these devices) is because it doesn’t cover much area, locally. But since I figured I’d use it in the camper, or immediately outside, I didn’t need a lot of sq ft coverage. This one covers up to 1,000 sq ft. And in hindsight this is probably the unit’s biggest weakness.
Once I had the booster, I had two things to figure out: power and the external antenna mount (and aiming).
For power, I had an unused step-down regulator floating around from a previous project. This would take the 12+ VDC from a camper (car) battery or the power outlet and drop it down to the 5VDC required by the booster. I threw this in a project box with a cigarette lighter plug on the input, and a barrel plug on the output. Power solved.
Next was the antenna. The receiving antenna that had to be about 20 feet higher than the local/transmitting antenna. Obvious answer here? PVC pipe!
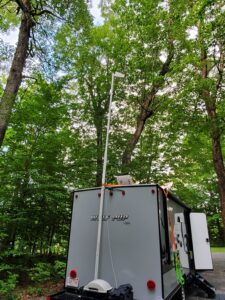
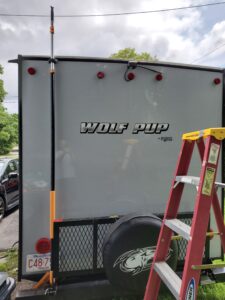
I took two 10 foot pieces of PVC pipe, one 2″ in diameter, and the other 1-1/2″, and slid one inside the other, overlapping by about 1 foot. I drilled a hole through the overlap, and put an eye bolt through (I had one laying around, and easy to screw in by hand). This gave me a 19′ tall mast. I knew I’d attach it to the back of the camper, and resting on the rear bumper gave me another 2′ of height.
To secure the bottom of the mast I needed something that would hold it from sliding around, but let me rotate the mast easily for aiming. I ended up using a PVC flange held to the bumper with a bungee cord. Easy to set up, cheap, and not permanent (in case this whole thing didn’t work).
For the securing the top end, I (initially) took the easy route and used a few ratchet straps looped over the roof and down the sides of the camper.
After the first trip with this setup, I got some… uh… “feedback” from my better half that I was making the camper look trashy with those neon straps and the PVC pipe. So a minor makeover was in order for the antenna and mast.
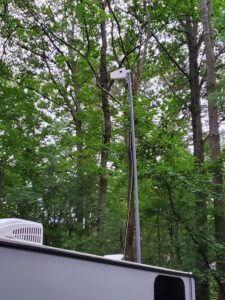
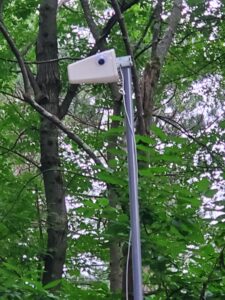
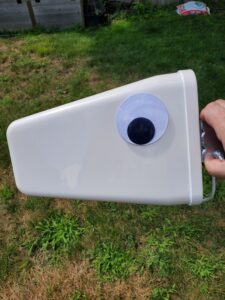
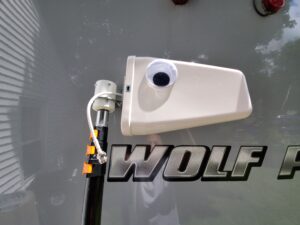
The mast got a coat of gray paint (matches the camper), the neon straps were replaced with black, and the antenna got a big old pair of googley eyes.
A few other things to note about the setup…
It was pointed out that my cable management is for shit. I should have run the antenna coax inside the mast. The mast collapses down to 10′, and I store/carry is strapped to the camper frame with a few heavy bungee cords.
So, that’s the set up… but how does it work?
First… aiming the thing. The app does a good job showing you the strength of the signal it’s picking up… with a minor exception. The signal strength gauge in the app isn’t updated in real-time. So you need to adjust the angle and wait about 5 seconds to see a response on the gauge. And a degree or two can make a meaningful difference. 5 seconds doesn’t sound like very long, but getting it perfectly aimed typically takes about 10 minutes because of this.
Aiming is also tricky because, at least for us, we’re trying to find the best position for two different frequencies (one for her phone on T-Mobile, and one for mine on Verizon). There’s a gauge for each, and we have to find the right balance between the two.
Once the receiving antenna is set up, we need to set up the local/transmitting antenna. As I mentioned above, this antenna is pretty weak, and has very little range. So I tend to move it around a lot (it’s on a 30′ coax cable) to position it near wherever I’m working. And proximity of the phone to the local antenna makes a big difference in connection speed. I may get almost no signal 10 feet away, but 3 or 4 bars with the phone right up against the antenna.
Since I’m mostly using this setup for internet access, I tend to turn on the hotspot on my phone, which has pretty good range, and then put the phone right next to the local antenna. This lets me move around easily, work where I want, and still keep a decent signal. But it’s a bit annoying if I actually want to use the phone.
I wish the entire setup process (assembling the mast, setting it up, aiming, power, etc) were a bit easier, and I do have some ideas for improvements here. And I wish the range on the local antenna was better. In hindsight, I should have spent a bit more to get better local range.
But, all in all, I’m happy with the setup. It has definitely enabled me to take trips that I wouldn’t have been able to without it, due to work.
Mods to the mod – Antenna Mast
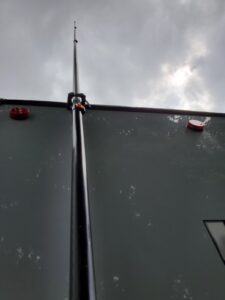
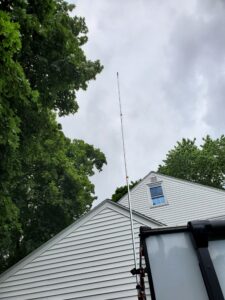
While the PVC pipe mast for the antenna worked, it was a pain to set up. So, I started looking for a better solution. I still needed the antennas to be 20+ feet apart, but I wanted to find a lighter pole, that was easier to extend, and to stand-up. I ended up finding telescoping pole on Amazon made by Extend-A-Reach. Collapsed its 7 feet, fully extended is 24 feet. Made of aluminum, its light weight, and waterproof. And the end has a threaded tip that fits into the end of a paint roller. That I figured I could use to easily mount the yagi antenna.
The original mast was held in place with tie-down strap, and a pain to put in place. So I looked around for an easier solution. I figured I could find a way to easily secure the bottom end of the pole (turns out it fits perfectly into the frame for the fold-down cargo platform), so I needed to find a way to easily hold the pole near the roof of the camper. I found these “quick fist” clamps for mounting tools. These are the perfect size, weatherproof, and a quick/easy way to lock the pole in place.
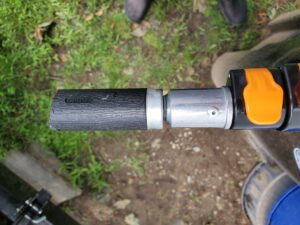
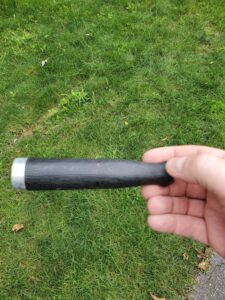
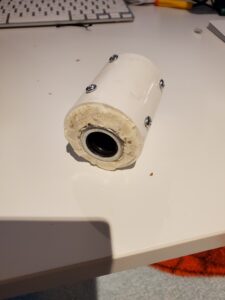
The last piece to solve was making a way to easily attach the antenna to the pole. I took the handle off an old paint roller, one with a threaded hole that fit the top of the pole perfectly), removed it from the roller, and cut it down to size. But the handle was too small around so I mounted the threaded handle inside a PVC pipe fitting. I put in a few screws from the outside to hold the handle inside, and filled the space around it with expanding foam. Its not pretty (see below), but it works perfectly, and lets me mount the yagi antenna to the pole quickly with no tools.
Rearview Camera
I don’t have a ton of experience towing, so I knew I wanted to make it as easy on myself as possible. So I knew that adding a rear view camera was going to happen.
I did a bit of research and found that, like so many things, you can find cheap (less expensive) options, and you can pay a fortune. I tend to be sort of cheap, figuring that I can hack an “ok” product into being a “good” product. Especially electronics.
For backup/rear-view cameras, there are two main “flavors”: wired and wireless. Given the relatively short trailer, and the fact that I don’t need perfect video here, I decided to go for the easier installation, and chose wireless. After shopping around, I landed on this this setup from XeoroxClub. The price was reasonable, and the reviews were good. When the unit showed up, quality appeared to be about what I expected. I was pleased to see that the camera body was die-cast metal and not plastic that would crack in the elements after a few months.
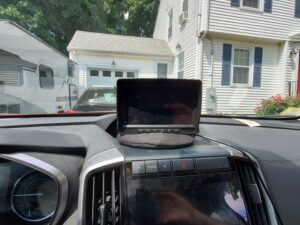
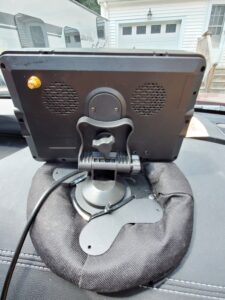
The display unit simply plugs into the cigarette outlet in your car. You could hardwire it, but I stash mine away when I’m not towing, and I don’t use the outlet, so hardwiring didn’t make sense for me. I originally tried to just set the display on the dash, resting it on the “foot” that came with it, but it frequently fell over. Again, I didn’t want to attach it to the car, so I found this weighted “friction dash pad” and I zip-tied the monitor base to this. Now I can just set the camera monitor on my dash and it’s completely stable, and easy to move. (See the pics below.)
The next step in the installation is the camera, itself. There are two parts to this: attaching the camera to the camper, and the wiring.
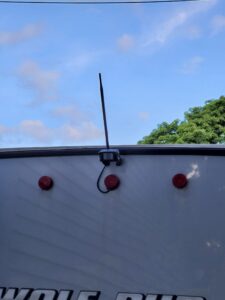
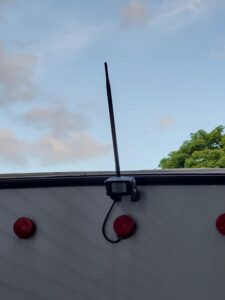
The camera isn’t too heavy, so I just drilled small holes in the back of the camper, filled them with silicone caulk and screwed the camera bracket to the wall. I mounted it relatively high on the wall for a few reasons. First, I thought the chances of me finding something solid (wood) to screw into were better up there. Next, the higher up, the better angle I’d have to judge distance for things behind the camper. And last, I was hoping that having the antenna poke up above the camper would get me a stronger signal, as opposed to having to travel through or around the camper.
For the wiring… I took the easy approach. Some people have written up articles about how they drilled into the cabin and found a power source in there. Instead, I opted to tap into the power for the running lights located right under the camera. I did a little research about the power consumption of the camera to ensure I wouldn’t overload anything, but in the end I just tried it out, and it worked great.
Now, when the lights are on, the camera is on. And honestly, this has saved me a few times. Sometimes I’ll hook the camper to the tow vehicle while prepping to hit the road, but I’ll intentionally not connect the trailer wiring plug to the vehicle because I’m still running things (the fridge) off AC power. I always remember to disconnect the house power from the camper, but I don’t always remember to connect the camper wiring to the car. BUT, because the camera works off the trailer lights, when I go to turn the camera on before driving away, it’s very clear that it’s not getting power (because I haven’t plugged the trailer into the car).
Tapping into the power is really easy. Remove the running light, identify the + and – wire (mine were marked, but use a tester, if needed), splice in the camera wiring. Easy.
The slightly more challenging part is making sure it’s water tight. When I removed the running light, I saw that it was sealed to the camper wall with some putty. A little research showed that it’s a product like this.. And this is what I used to seal it all around the camera power wire. Stating the obvious, if you do this, run the wire out of the bottom edge of the light to ensure water doesn’t run down the wire into the camper (learn about drip loops). So far, no problems.
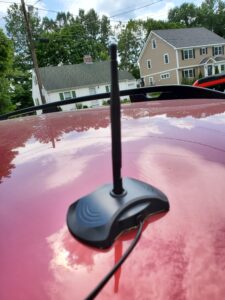
All-in-all, the installation went fine. And the camera worked pretty well. Occasionally, the video would freeze. Best I could tell this was due to interference from other signals (rarely happened on the highway). In an attempt to improve this, I made two changes. The first, was I upgraded the antenna attached to the monitor. The antenna on the monitor and the camera were these little 6″ whip antennas. And I replaced the camera antenna with this one from Amazon.. I also replaced the monitor antenna with this one.. The goal here was to get the antenna outside of the car, and a little closer to the camera. Two comments about that antenna. It was supposed to have magnets on it, but showed up without them. The seller refunded my money, and let me keep the product. I had a couple of small, high powered magnets laying around and superglued them into the base. I then covered the base with duct tape to ensure it didn’t scratch the paint on the roof of the car. The antenna upgrades worked well, and the signal is really solid now.
Camera Antenna Relocation
The camera setup above works fairly well, but were still occasional moments when the video would freeze. It never happened during a critical moment, but I wanted to resolve it anyway. I started thinking about ways to get more consistent reliable video. I considered a wired set up, but I appreciate having one less thing to hook up and disconnect. I could replace the whole system, but I’m cheap. And I wasn’t sure I’d get a better set up unless I spend a lot more money… and I’m cheap. So, I started thinking about how to get the antennas closer together. With the extension and the magnetic mount (above), I’m able to mount the display antenna right on the rear of our tow vehicle. So the only option was to move the camera antenna forward, much like I’d moved the display antenna backward.
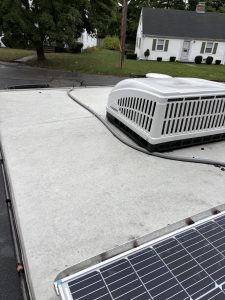
I got an antenna extension and a small surface mount antenna. I attached the extension to the camera in place of the antenna, and ran the cord forward across the roof. I had some left-over 3/4″ flexible PVC pipe that I put around the cord to protect it from the elements. I secured the PVC with galvanized hose/pipe clips screwed into the roof, and waterproofed with Dicor. I also mounted the remote antenna towards the front of the roof with Dicor.
This setup works perfectly, and the video is rock-solid.
Inside Speaker Upgrade
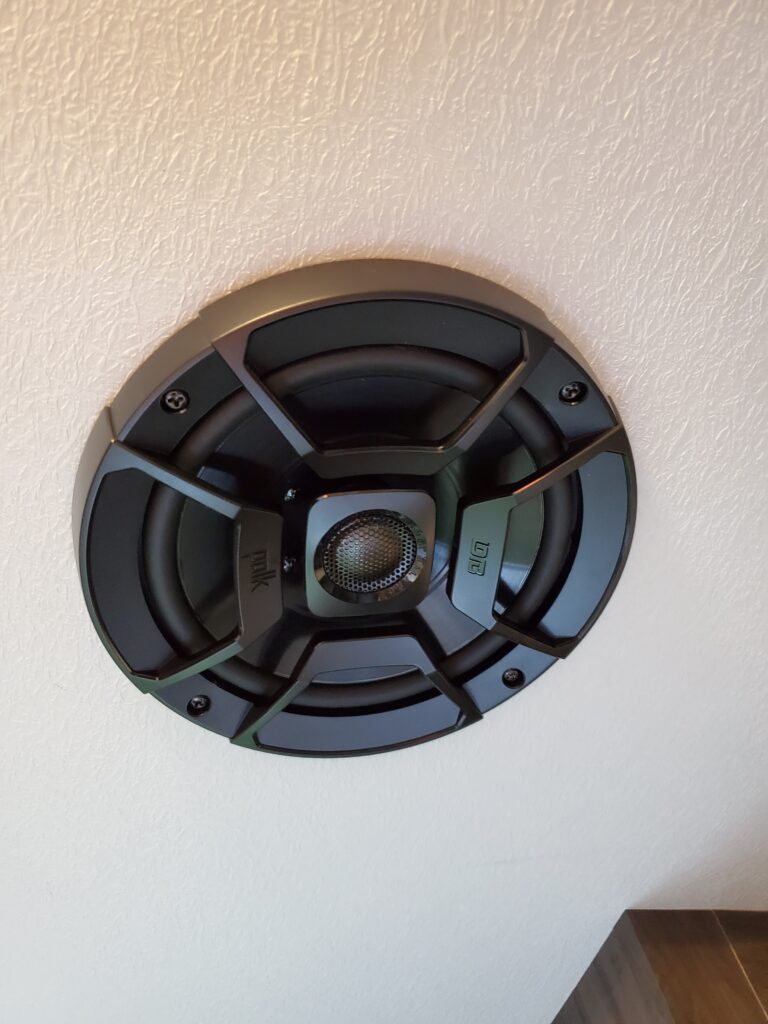
We like music. A lot. Our whole house is wired for sound. Bedrooms, kitchen, living room, playroom, a bathroom, and even the deck (complete with subwoofer). And while we don’t blast our tunes while camping, it’s still nice to have decent sound.
The Wolf Pup came with a sound system which included radio, bluetooth and an indoor zone and an outdoor zone. But, the speakers were junk. So, one of the first upgrades I did was to replace the inside speakers with a pair of Polk DB652 6.5″speakers. I chose these because:
- Polk makes a decent speaker for the cost. I’ve got 2 pairs in my Wrangler and they sound great.
- They’re efficient (92 dB sensitivity) so they do well making good sound out of little power, important given the somewhat anemic head unit.
- They’ve got a decent lower end for the size (these preceded the subwoofer)
- The marine IP55 certification means the elements will never be a problem (yes, they’re inside, but still..)
- The price was reasonable
- They fit the stock holes (right diameter, not too deep) and they’re light-weight enough that the thin ceiling can still support them.
All in all, they sound pretty good. The head unit is still too underpowered to get really good sound. But this is a huge step up.
Overhead Cabinet Door Lifter
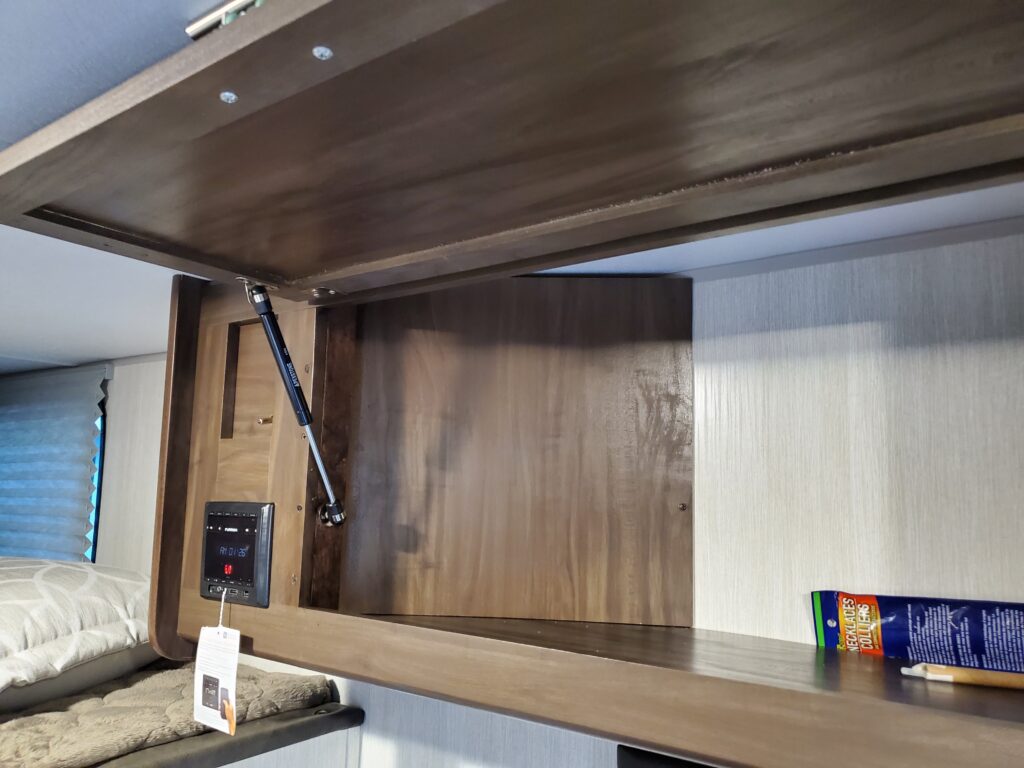
We tend to store food in the cabinets over the dining table. These cabinets swing up, which make them space-efficient. But it’s tough to dig around in the cabinet, and impossible to grab something with one hand. So, in a common mod, we added gas struts (lifters) to hold the doors open.
There are two tricks to this mod, finding the right strut, and the installation itself. Struts vary in size (length) and power. Size is key to ensuring the fit, and power is important to ensure the door stays open (and doesn’t damage the frame). For this application I used 10 lb, 10 inch struts, and they worked perfectly. They’re strong enough to hold the door open, but still easy to close.
The slightly more challenging part was the actual installation. If your cabinets are solid wood, then you don’t have much to worry about. The doors on our cabinets are solid wood (thanks to the Black Label Edition) but the cabinet frames are still particle board. And over time, the pressure from the strut when closing will rip the screws out of particle board. So, I mounted a short piece of 2×2 to the back of the cabinet face (stained to match the cabinets) and mounted the lower end of the structure to that. Note that the 2×2 is resting on the bottom of the cabinet to help absorb the constant downward pressure when the cabinet is closed.
Monitor
I mostly work on laptops, using just the built-in display. But when it was clear that I’d be working from home for at least the entire summer of 2020, I decided to get a computer monitor for home. While I was shopping around, I decided to keep my eye open for one that had HDMI inputs and could run off 12VDC (or less). Amazingly, I found exactly what I was looking for in this relatively cheap Sceptre 24″ monitor The size, inputs, and power requirements mean that I can easily use it in the camper as well as on my desk at home.
And currently, that’s exactly what I do (take it off my desk when we go camping). But, for the $100 price tag, I may buy one just for the camper.
The Wolf Pup came with a hanging bracket for a monitor. There’s actually one inside over the queen bed, and another outside on the side of the camper. We only ever use the inside one. For power, I have a cable with the appropriate barrel connecter on one end and a cigarette lighter plug on the other, which goes into the power outlet. My phone has a USB-C port, to the USB-C-to-HDMI adapter for my laptop works perfectly to allow my phone to drive the monitor. This means I can download Netflix shows to my phone for viewing on the monitor.
And sometimes we’ll load up an iPad with shows. And for that, we use the…
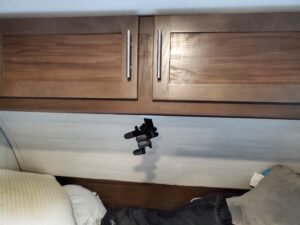
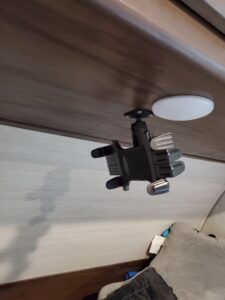
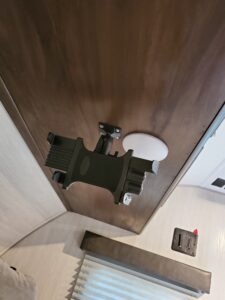
Tablet Mount
On the first few trips, we used the iPad for a little video entertainment before bed. We’d lay in bed and prop it up on a pillow. It would fall over every few minutes, and be uncomfortable to watch. So I found this tablet mount. It holds just about any size tablet, and even my phone, at just about any angle. It’s easy to mount and you can easily take down the majority of the mount, leaving just the mounting plate, without any tools if it’s in the way.
Solar Suitcase
As mentioned above, more often than not, we’re at sites without power. So, we primarily rely on a few car batteries that we swap in when one goes flat. But, we’d rather not swap batteries and realize that eventually these will run out. So, we started looking into solar. Like many of these technologies that are new to me, I like to try them out a bit before committing (a lot of money). So when it came to solar, it was clear that a “solar suitcase” (a sizable, but portable solar panel setup) was the right first step. So, I studied up, shopped around and decided to go with this Renogy 100 watt, two panel solar suitcase. The nice thing about this setup is that it’s all self contained, and includes everything you need (the panels, the charge controller, and the battery hook-up cable).
After buying this setup, I tried it out on a few trips. The panels successfully replenished the power we use in 24 hours throughout a single sunny day (assuming about 8 hours in direct, bright sun). That said, it’s tough to keep anything on most campsites in bright sun all day. And rarely do we have sunny days every day in a trip. But, we have multiple batteries, so it’s not a problem. But if we ever try a trip longer than 5 or 6 days with no external power along the way, we might have a problem.
This setup is expandable, meaning that I could add another pair of panels to this existing controller, doubling the power generation capability. As tempting as this is, we haven’t needed it yet, and juggling twice as many panels isn’t appealing. So, I’m not doing this soon.
One other tweak I eventually made to this system was to pick up this extension cable, these connectors, and this connector. The extension cable gave me more range and flexibility on where I place the panels. And the connectors let me build a simple adapter to allow me to plug this system into the “solar ready” port on the camper (a DIY version of this adapter).
Keyless Lock For Underside Storage
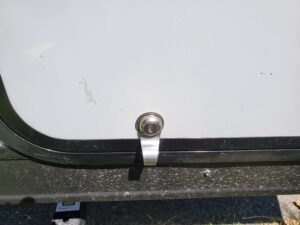
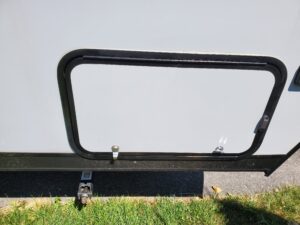
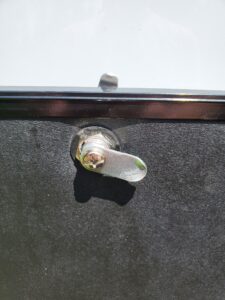
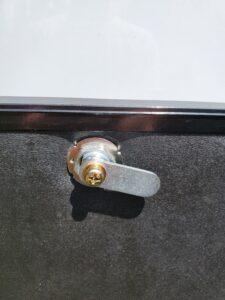
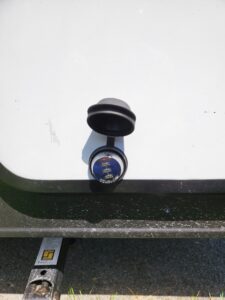
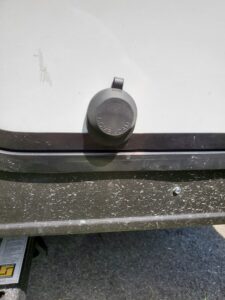
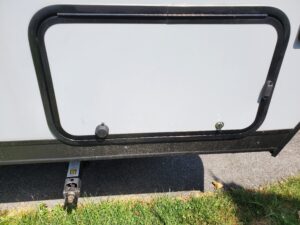
This is another really easy mod. I replaced the keyed “cam lock” with a combination lock for the outer hatch door that accesses the under-bed storage. This cam combination lock was a drop-in replacement for the keyed lock on our storage hatch. It saves us from having to hunt down the keys whenever we want something from storage, and means we lock it more frequently. I also got this rubber dust cover for it to make the lock last longer, and sort of hide the fact that there’s a combination lock there. This cover feels a little cheap and brittle, so I’m not expecting it to last very long.
Assuming this lock lasts, I’ll likely replace the cam lock on the outdoor shower door as this lock sticks a lot (done in 9/2020).
External Speakers
I’d been wanting to upgrade the external speakers since we got the trailer. The sound was soft, and muted, and didn’t sound good at low volumes. But, we rarely use those speakers (partly because of the sound quality, I’m sure), so it didn’t make sense to spend money on the upgrade. Well, when we pulled the camper out of storage this spring, one of the outside speakers sound really distorted, and the other sounded slightly distorted. A little research turned up that these were the original speakers. I found them listed somewhere else for $9 each, which explains the poor sound and short life. But, more importantly, it gave me an excuse to upgrade the external speakers.
As mentioned above, while I like music when camping, I’m not looking to blast it. I’m looking for quality sound at relatively low volumes. And, also covered above, we have the sub-woofer for when we want high fidelity.
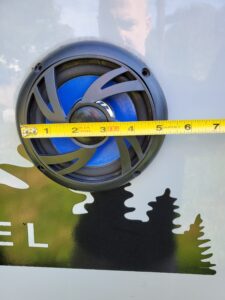
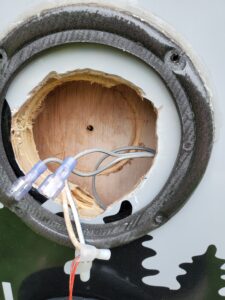
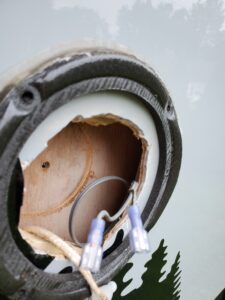
So, this means I wasn’t looking to spend a lot of money on high-end components. Cost, water-resistance, size, and brand name (and some experience) led me to choose a pair of Polk Audio DB522. These may look familiar because they’re the 5-1/4-inch version of the speakers I put inside. I probably could have gone with the same 6-1/2-inch version but I was trying to make the swap as easy as possible, and those would definitely require me to make a bigger hole in the wall. And, since we don’t need it loud, these should do. They are the same size as the originals, and will definitely sound better. You can see from the pictures below, they weren’t very precise when they cut the holes for the original speakers. It looks like they started with a (too-small) hole saw, then free-handed a router to make the hole bigger. But, you can’t see it with the speakers in place, so I guess is doesn’t matter.
Battery Monitor and Quick Charge Outlets
The “Black Label” package on the Gray Ghost came with a “battery minder”, also known as a voltmeter. While it gives you a vague indication of the state of your battery, it’s mostly along the lines of OK, Almost Not OK, and Not OK. You have to turn off just about anything using the battery to get a decent reading and even then it’s not very precise. Note, the gauge works as intended, but voltage (alone) doesn’t tell you all you want to know about the state of a battery.
And, again, we’re rarely on site with power, so knowing what’s going on with the batteries is important to us. Fundamentally, I want to know how much “time” I have left on a battery, or how much is left in the “tank”.
So, I started looking into better battery monitors. To oversimplify what I’ve learned….the better/best battery monitors:
- Determine the capacity of the battery (typically by asking you to enter it each time you change the battery).
- Keep track of what you pull out of the battery (more below)
- Do some math to determine how much power is left, usually presented as a percentage of the battery.
This is considerably more accurate and informative than just using voltage. With a meter that measures power used, you can determine how much capacity you actually have (run a battery till ’empty’, measure what you use, and then you know its capacity). Do it across all your batteries, add ’em up, and you know your total capacity.
You can also get a sense for the rate at which you consume power (e.g. how many Ah (amp-hours) per day). So, this lets you estimate how many days you can camp for off the batteries you have.
It turns out that in the battery meter space, there’s the Victron line, and there’s everything else. Just about everything else out there compares itself to the Victron. And while ultimately a fair bit more expensive, I went with the Victron, too. The big reason I chose the Victron is because it measures the power being used (many meters do), but it keeps track of what you’ve used. AND, it also makes it really easy to update the meter’s capacity setting for your battery via an app that connects to the meter via bluetooth.
The Victron is one of the few meters that uses Ah-consumed relative to Ah-in-the-battery-when-fully-charged to display remaining capacity (most use voltage). This makes it more accurate. And the blue-tooth interface makes it trivial to update the capacity remaining when you swap batteries. All this adds up to a better sense for the power we’re using, the power we have left in a given battery, and the power we have left in the remaining batteries.
We don’t have a battery bank. We have a bunch of batteries, and we swap them in as needed. This means roughly every two days I need to swap in a new battery. And, to effectively keep track of how much power we have left in the current battery, we need to update the meter when we swap batteries (tell the meter how much power is in the new battery). The Victron BMV-712 makes all of that easy.
Also, as mentioned above, we have the Solar Suitcase. The Victron also measures Ah put back into the battery via charging. Again, this is a critical feature if we’re going to use solar and keep track of the power left in a battery.
While on the topic of battery meters, one other point… to measure the power-actually-used, battery meters use a “shunt” which is a small monitoring device that sits between the negative pole of the battery and the load (often carried via ground/frame in cars, travel trailers, etc). That means all current from (and to) the battery flows through this thing. The shunt is connected to the monitor, and that’s how the monitor “knows” how much power is pulled from (or pushed to) the battery.
Unfortunately, most shunts have some exposed circuitry, which means they’re not well suited to being inside your typical tongue-mounted plastic battery box. So, when I ordered the monitor, I also order a box to house the shunt.
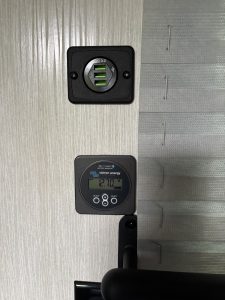
While I was installing the battery monitor, I also decided to upgrade the USB outlets by the bed to quick-charging outlets. The charging part was cheap off Amazon, and fit right into the stock bezel/wall-mount. It works well for phones. If I were going to do it again, I’d use something like this with PD charging ports instead. That way we could also charge laptops.
Battery Upgrade
Why do this mod?
We ran the camper for a few seasons using deep cycle sealed lead acid (SLA) batteries. We had 3 of them, and would charge them all at home, put one on the camper, and bring the other two along. If we had good sun on the site, we’d use the solar suitcase to recharge the battery. But if the site is shady, or the weather isn’t sunny, we could swap in another battery. The problem is that these weren’t top quality batteries to start with, and they didn’t have great capacity, so we’d get about a day’s worth of power… maybe two, out of each battery. And, SLA batteries are “damaged” if you use more than 50% of their capacity. The Victron battery monitor could have helped me avoid drawing too much power from these, but I’d still need to know the actual capacity of each battery (always less than the listed capacity, depending upon the “health” of the battery) and watch the usage and swap out as soon as it hits the critical point (which may happen during the middle of the night).
So, when I learned about the benefits of LiFePO4 (Lithium Iron Phosphate) I became very interested. The quick summary of the benefits include:
- Ability to completely drain the battery without damaging it, effectively making a 100ah LiFePO4 battery twice the capacity of a 100ahSLA battery.
- Quicker to charge
- Roughly half the weight of SLA batteries
- Minimal charge loss at rest
- Expected 10 year life span
- Can be safely stored inside (don’t give off hydrogen when charging like SLA batteries)
The “cons” of LiFePO4 batteries are:
- Cost. A decent 100ah LiFePO4 battery runs close to $500, a little more than twice the cost of SLA
- Different charge profile. To fully charge a LiFePO4 battery, a standard SLA charger won’t do it.
- They can’t be charged while “frozen”.
So, the initial price tag gave me pause but when I figured the annual spend to replace SLA batteries vs the lifespan of LiFePO4 batteries, it was clear that this will pay for itself in a few years. Add on to that the increased capacity, and removal of the need to monitor and switch batteries, and it was a no-brainer for me.
What we did…
So, there are LiFePO4 batteries out there that are drop-in SLA replacements (e.g. Battle Born), but I didn’t want to pay the premium for those. I also wanted to be able to use my existing SLA batteries as additional/backup capacity. I also knew I wanted to keep the LiFePO4 battery inside the camper. The main reason for this was the cost of the battery, and wanting to keep it secure. It also means I can leave a battery in the camper when it’s parked in storage between trips because it’s locked inside. So, rather than replacing the existing battery on the trailer tongue, I wanted to add a second, the LiFePO4 battery.
Adding the second battery had a few implications…
First, it meant I needed a switch to go back and forth between batteries. It also meant a lot of new wiring to set up a spot inside the RV to connect the new battery. And, lastly, it meant I needed to replace the charger/converter with one that could handle both SLA and LiFePO4 batteries. This last part was actually the most complicated. Technically you can use the original SLA converter/charger with LiFePO4 batteries, but apparently it will only charge the battery 90% of the way. I wanted as much capacity as possible. So, I started looking into what it would take to upgrade. Our camper has the WF-8955 power center. This is a 55amp unit. The recommended/supported option for this model is to replace the charger/converter with the WF-8950l2-mba main board assembly or to replace the entire power center with the WF-8955LiS. The nice thing about this model is that it’s switchable between charging profiles for SLA and LiFePO4 batteries. Replacing the entire power center meant spending $200 for the new one AND having to do the swap which meant removing every circuit in the RV from the old one and then reconnecting to the new one. Replacing just the converter with the WF-8950l2-mba would cost $220 for the parts and I’d only be able to run LiFePO4 batteries. I did consider buying the entire power center, and then try to swap just the converter/charger, and I ran that idea by tech support at WFCO. They said it wouldn’t work because the switch it on the main circuit board, so I’d need to swap that in, too. At which point, I’d have done 95% of the work of putting the new power unit in.
But, as I was searching around for these parts, I discovered the WF-9855-LIS. This unit is 55amps like my original and supports both LiFePO4 and SLA batteries (via a switch you can install yourself). It’s intended for the WF-9800’s series power units, but I checked the dimensions and it’s just a fraction of an inch taller than my original converter, so I was pretty sure it would fit. The one “incompatibility” was that the WF-9855-LIS got its AC power through a cable that had a regular household plug on the end, and I needed bare wires… nothing some wire-cutters couldn’t fix!
Because WFCO was so helpful and responsive to my first round of questions, I ran this plan by them, and they said this converter/charger had all the right technical specs to work in my unit and would support both battery types. Again, this unit isn’t intended for the WF-8955, but (spoiler alert!) it works just fine.
How we did it…
There were 3 main parts to this mod:
- Planning, researching and buying the parts (battery, wire, switch, and charger/converter)
- Wiring up the new battery
- Upgrading the charger and converter.
Wiring up the new battery
I covered above my research on converter/charger units. Next I had to figure out where to put the battery. Again, LiFePO4 batteries are safe in enclosed spaces, so it was really a matter of where I had space that was relatively easy to get to yet out of the way. I decided to put the battery under one of the dining table bench seats (the front one). Once I had the location figured out, I could determine how much wire I’d need, and start figuring out where to put the battery selector switch. I picked up the following parts:
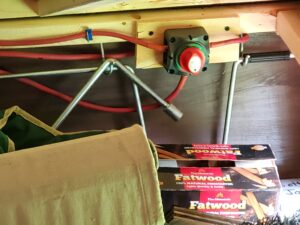
- Battery selector switch
- Wire
- Connectors
- AC LiFePO4 charger (“cheap” one)
- Ampere Time 200AH LiFePO4 battery
- Switchable Converter/Charger
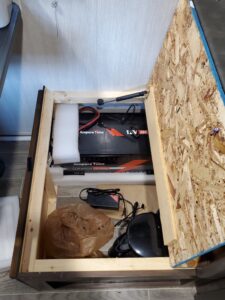
I chose to put the battery selector switch in the front, under-bed storage unit just inside the exterior access door. I chose this spot because it’s accessible, but “hidden” and secure. I also like the fact that I could get to it from the outside without opening the door and putting down the stairs. This means I can easily connect/disconnect the battery from the outside (good for putting the RV in storage, and getting it out).
One other minor complication was the ground/negative wire. The Victron battery monitor tracks power used via a shunt inline between the battery and ground (the chassis). When I installed the Victron I mounted the shunt inside a weatherproof box just inside of the front frame rail. So, I had to run a ground wire from the new battery location to the shunt. For the rest of the wiring, I ran a positive battery cable from the new battery location to the front corner of the under-bed storage area where the switch would go. I ran another positive battery cable from the original battery location (trailer tongue) to the under-bed switch location. And the last wire was from the switch location to the factory circuit breaker inside the front frame rail.
Once this was done, I had a functioning two-battery system, but still with a sub-optimal charger for the LiFePO4 battery. So, the last step was to replace the charger/converter. The converter is pretty simple in that it has one set of AC wires (hot, neutral and ground) coming into it, and one set of DC wires coming out (+ and -).
First step here is to disconnect all the power, AC and battery. So, I pulled the shore power cord from the camper, and flipped the battery disconnect switch. Next I removed the power center faceplate and took out the two screws holding in the power converter. With those gone, the old converter slid out, making it clear which wires (DC + and -) needed to be disconnected from the main circuit board (green board in the picture). And I also disconnected the AC neutral and ground from their respective bus bars, and the AC hot wire from the breaker. First I “dry fit” the new unit by sliding it in to make sure it would fit and there was enough airspace around it for the built-in fan to be effective. Then I started connecting wires…
As I mentioned above, the converter I bought had a 120v household plug on it, while the original wired directly into one of the 120v breakers. Rather than cut the plug off (I wanted to be able to return the unit if it didn’t work) I decided to cut the receiving end off a 15A extension cord, and I wired that into the breaker designated for the converter. This gave me a place to plug in the new converter. I had some wire left over from the battery install, so I cut two short cables to connect the DC output terminals from the converter to the circuit board terminals where the original converter was connected. I also installed two wires, each about 12” long, in the switch terminals on the converter. This is what determines whether the charger uses an SLA charging profile or LiFePO4 charging profile. These will go to a switch mounted just inside the power center door to allow me to switch back and forth between battery types. Before stuffing the converter back into the power center, I tested everything, including the different charging profiles. It all worked, so I carefully stuffed the new converter into the power center, making sure the fan and vents weren’t blocked. Fortunately, the mounting screws were located just as the original ones, so I was able to secure it with the original screws.
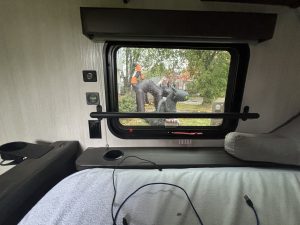
Bar In Front of Window
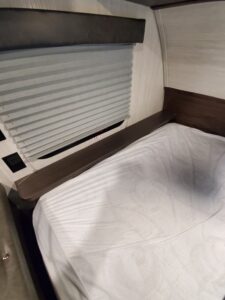
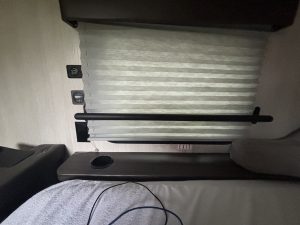
In the camper, we often sit in bed when we’re just hanging out inside. And its more comfortable if there’s a wall to lean against. But, the “front” wall (the front wall of the camper) is too short to lean against because of the overhead cabinets and it also curved. And the side walls at the head and foot of the bed have windows on them. And the windows have pleated shades, so you can’t really lean back on them. So, I found this handrail/grab-bar and installed it in front of the window. It matches the brown in the camper and provides enough support to lean a “reading pillow” up against it, but doesn’t block the window or get in the way. I did intentionally install it with wall anchors into the panelling. Its sturdy enough to support leaning on it, but it would be easy to rip out if the window was ever needed for an exit).
Double Propane Tanks
I never have a good sense for how much propane I need, or how much is in a tank. So I decided to switch from a single tank setup to a double tank setup. With the move to a LiFePO4 battery, I relocated the battery inside. So, I had room on the tongue for two 20 lb propane bottles. The conversion was pretty simple and required the following parts:
- Rack for 2 tanks
- Controller to switch between tanks
- Hoses
- A cover for both tanks
- Long shackle padlock
I should say… if you’re not comfortable with plumbing and gas, don’t do this yourself. If you do attempt it, read up on how to safely connect the propane hoses, and make sure you test for leaks.
I’m alway paranoid that I’ll loose a propane tank on the highway and cause a catastrophe. So I bought some tie-downs and I alway tie down that tanks in addition to securing them with the rack.
I also drilled a hole in the big bow-tie nut on the rack that holds the tanks in place that was big enough for a long-shackle padlock I had laying around. This prevents the bow-tie nut from being able to turn, so the tanks can’t be removed with the lock in place. This means I don’t have to worry about the tanks disappearing while the camper is in storage.
New wheel-hubs, brakes and bearings
I was due to repack/replace the bearings, and I decided to replace the brakes while I was at it. While it may be possible to replace the brake pads, it looked a lot easier to replace the whole hub and not much more expensive. The hubs, which include all the brake components and the hub itself cost about $55 each (left and right). The bearings (Timken Set17 for my camper) were about $10.
I’ve done enough work on cars and motorcycles that this replacement was very straight-forward. Its not hard to do, but it does require a large torque wrench. There’s also a bit of a process to get the new brakes seated and functioning fully. But its in the instructions, and there are videos on youtube.
LED Under-lighting
Lorem ipsum dolor sit amet, consectetur adipiscing elit. Ut elit tellus, luctus nec ullamcorper mattis, pulvinar dapibus leo.
LED Awning Roller Light
Depending upon the weather, we often find ourselves hanging out under the awning at night. Also, we tend to eat dinner late, and eating in the dark is a pain. So I started thinkg about more lighting under the awning. Blue “mood” (accent) lighting came with the camper, but its not nearly bright enough. But, I like the look and didn’t want to remove it. I noticed there was an unused channel in the awning roller, and decided to put a new LED strip there. I wanted it dimmable, and to look decent, so I found this COB LED strip. The color is nice (the shade of white) and the continuous strip of light looks better than the spaced-out LEDs on most stripes.
While it fit in the channel in the awning roller, that wasn’t enough to hold it in place, so I used 3m doulbe-side VHB tape, and that worked great (the adhesive backing on LED strips is worthless).
The biggest challenge was the wiring. Ideally I wanted something that would roll up easily with the awning. I did figure out a design by looking at commercial products, but it required fishing a thin wire through the edge-seam of the awning. And the seam on our awning it tiny, so I gave up on that. Instead, I ended up running the wire in parallel to the power wire for the awning, from the awning wall mount through the awning arm to the roller. But this meant I had to make the connection to the strip light detachable so I could roll up the awning. I ended up mounting a magnetic connector in the housing for the awning roller and the other end to a short wire on the end of the LED strip. This does mean I need to connect/disconnect the lights when rolling/unrolling the awning. But the magnetic connector makes this really quick/easy. It will also “break away” if I roll up the awning and forget to disconnect it.
Inside, I ran the wires to the location of the other outside switches (just inside the door) by fishing the wires through the ceiling. I also added a dimmer (same one used on the interior lights) to give us control over the brightness.
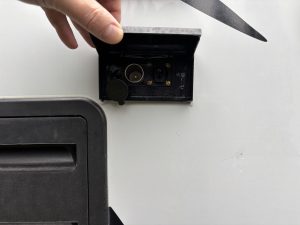
External 12v Outlets
For a while, I was running a 12vdc extension from the outlets I installed inside to have 12vdc power outside. We’d use it primarily to charge phones, and it worked fine. But as I continued to refine the cell repeater system, I regularly needed an external 12vdc outlet. So I added one that matched the existing outlet covers. I added both a high-power SAE connector and a cigarette-lighter style outlet. Both are protected with a 30A breaker.
This was pretty easy, once you get past cutting a hole in the camper wall. I positioned the outlets inline with the existing outlet covers (110AC, and TV jacks), because I was likely to avoid any studs that way. It was also just outside the cabinet under the stove, which gave me an easy way to route the power cables inside and to the power center.
New Cell Repeater
Lorem ipsum dolor sit amet, consectetur adipiscing elit. Ut elit tellus, luctus nec ullamcorper mattis, pulvinar dapibus leo.
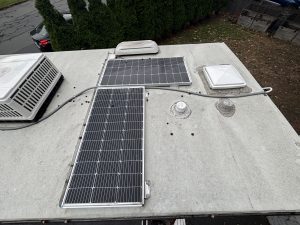
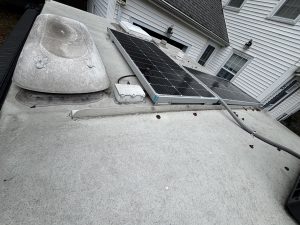
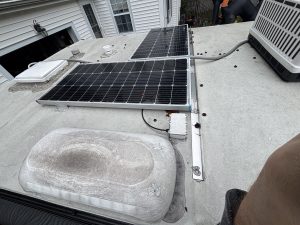
Roof-Mounted Solar Panels
At a high level, there are two main (additional) components when adding solar: the panels and the controller. The controller regulates the power (voltage and current) coming from the panels to effectively and safely charge the battery.
- Panels and controller – These are the main components, and this kit was exactly what I was looking for. First, its a well-known brand, known for pretty good quality. Second, it contained two panels. I have room for more, but I wasn’t sure I’d need them, so I started with two. That said, I wanted to make expansion easy, so I chose the kit with. a controller than can handle more. The 40a controller can handle 480 watts from the panels. Each panel can produce up to 100w, so I could have 4.5 panels with this controller (and yes, they do make 50w panels). This is also a MPPT controller (as opposed to a PWM controller), and MPPT is more efficient.
- Bluetooth for solar controller – While the kit had the right sized components, one thing it was missing was bluetooth capabilities, to monitor the controller. But, there was an add-on for that, so I added it on. Note, this wasn’t necessary. The display on the controller tells you everything you need to know. But I put the controller in some dead cabinet space under the sink, so having bluetooth access makes checking on the system much easier.
- Breakers – This is an electrical project, so you need breakers. I used two of these. They offer protection, along with an easy way to disconnect the components. One breaker is between the panels and the controller. The other breaker is between the controller and the battery. When I remove the battery for storage, I pop both of these open.
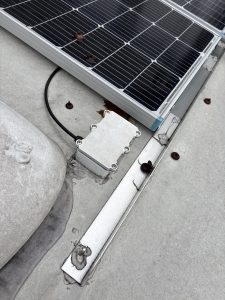
- Roof waterproof junction box – I used this to create a water-tight way to get the cables from the panels on the roof into the camper. I spray painted it white to blend into the roof and minimize heat.
The main steps to the installation were:
- Install the panels on the roof
- Run wires from the panels to the controller location
- Mount the controller
- Connect the panels to the controller, and connect the controller to the battery
- Setup the controller
- Test it!
Installing the panels on the roof
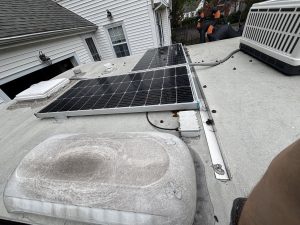
I probably over-engineers this bit. I decided to use a piece of aluminum “angle iron” as a wind break in front of the panels. I have this fear of the wind ripping the panels off as i cruise down the highway. Properly installed, this isn’t a real problem. But, I had the aluminum, and a few screws into the “studs” in the roof (along with plenty if Dicor) and this part was done.
Similarly, installing the panels was pretty easy. First I mapped out where I wanted them. The main considerations for placement were:
- Leave space for more, if needed
- Close enough together, and to ingress point for wires to reach
- Leave space to walk from front to back
- Towards the back to catch less wind
The installation is really simple… Connect the wires on the back of the panel, attach brackets to the panel, and screw the brackets into the roof. I used a stud-finder to figure out where the screws would hold best. But, honestly, I think the plywood on the roof is more than capable of holding the screws. For each screw into the roof I drilled a small pilot hole, filled that with Dicor, then put the screw in, then completely covered the screw with Dicor.
Run the wire from the panels to the controller location
The panels came with “Y” connectors to make cabling the panels together easy. The standard solar cable connector is water-proof and just snaps together easily. So, connecting the panels to the cables was easy.. the trick was getting them into the camper.
I decided to go in just above and behind the microwave. There’s plenty of space back there, and I didn’t have to worry about how it looks.
I mapped out the location both inside and out to make sure I wouldn’t hit anything. Then I drilled a tiny hole from the inside, out. After confirming that the hole was where I expected, I went on the roof with a 3/4″ spade drill bit and drilled from the outside, in.
The waterproof junction box I picked up came with a cable gland to get the cable from outside the box to the inside in a relatively water resistant way. I drilled a 3/4″ hole in the back of the box and rounded the edges of the hole. I also drilled two smaller holes for screws. I put dicor around the holes, put the box down on the roof over the hole to the inside, and threw two screws from the inside of the box into the roof. I did specifically make sure the cable gland was on the backside of the box, to avoid rain getting pounded in there as I drive.
I installed the cable gland in the box, pushed the panel cable through it, down into the interior. I had some spare wire loom laying around, so I slipped that over the cable before running it inside to protect it from abrasion.
Once I had the cables in behind the microwave, I cut a hole in the wall behind the microwave, and the wall behind/under the stove. I fished the cable from the roof down into the space under the sink.
Mounting the controller
Again, I probably over-engineered this bit. I wanted the controller out of the way, but accessible. Under the sink, just above the floor, on the right side made sense. But I decided to build a little swinging panel (like a tiny door) to mount the controller on. This lets me swing the the controller into full view just inside the door when I need to get to it, but also lets me swing it back into the cabinet to allow access to the rest of the space… just like I did with the subwoofer mount. I also left enough space on the mounting panel to mount the two breakers.
I also connected the bluetooth module at this point and mounted it against the back of the cabinet face.
Connecting the panels to the controller, and the controller to the battery
This part was easy. there are recessed terminals in the bottom of the controller. Strip some wire, turn some screws, wire in the breakers, and the cable from the roof and the cable to the battery were connected to the controller.
I decided to tap into the battery wires at the main electrical box. It does mean a slightly longer run from the controller to the battery, but its only a few extra feet, and I used beefy wire for this and the battery. This was much easier than going from the controller location to the battery location.
Its worth noting that you can run the load on the battery through this controller. That means that power goes in and out of the battery through the controller. I didn’t do this as it would have been more wiring. But this means the controller can’t be used to monitor the battery’s level of charge. If I didn’t already have the battery monitor, I definitely would have used this feature of the controller.
Setup the controller
Again, pretty easy. There are a few parameters you can set, but the main one is the battery type (LiFePO4). With some controllers you also need to set the system voltage, but this controller auto-detects it.
Test it!
The final step was to make sure it all worked as expected. I tested the breakers first using an electrical tester. Then I connected the bluetooth app to the controller and it told me how much power the panels were generating, and how much was being sent to the batteries. I disconnected the solar panels (with the breaker) and ran all the lights and fans, and charged my laptop until the battery monitor told me I’d knocked 10% or so off the battery. Closed the breaker for the panels, and the battery began charging. (The Victron monitor was great here, it let me know how the battery state was changing.)
This was a big project, but SO worth it. Between this and the move to the LiFePO4 battery, my concerns over power usage while on a trip are gone. I used to bring multiple SLA batteries with me. And now, we barely make a dent in the LiFePO4 battery. While we use power during the day, the solar panels keep the battery topped off. We draw down the battery at night, but rarely more than 10-15%. And, if we get good sun the battery is fully charged before we wake up. Even indirect light will just about charge it by the end of the day.
I’d really love an excuse to add more battery capacity and more solar panels (I love electronic/electric projects), but there’s just no reason. The battery would hold us without any solar for 5+ days or more. And with just a little sun its topped off quickly.
The only reason to increase capacity is if we wanted to run the AC off batteries (with an inverter). But the additional cost would be thousands of dollars… mostly for the batteries. And, since we camp primarily in New England, we just don’t need it.
Kitchen Drawer
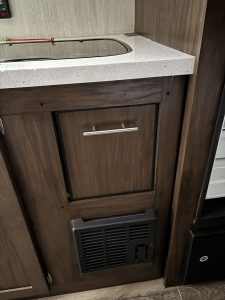
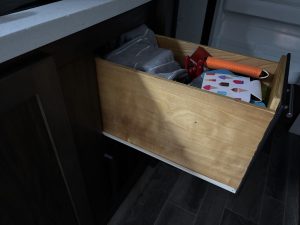
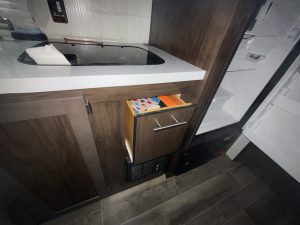
I’m alway looking for ways to get more storage space. And there was no good place to store kitchen stuff like silverware, towels, pot holders, koozies, etc. And one day I noticed this dead-space above the furnace.
Now, before I get yelled at… I ran the furnace for a while and checked the temperature in that space… its just fine. There’s a sheet metal heat sheild around the furnace, and it seems to work well.
To make this drawer, I knocked out the panel in this space to use as the drawer front. I built a box out of plywood, attached some drawer rollers, and was good to go. The local Home Depot had hardware to make the pull match the rest of the cabinets perfectly.
I couldn’t figure out how to make the edges of the plywood drawer face look nice, but I found this edging, and it looks ok.
It definitely looks “home made”, but it works really well, and got us some storage right where we needed it.
Title 5
Lorem ipsum dolor sit amet, consectetur adipiscing elit. Ut elit tellus, luctus nec ullamcorper mattis, pulvinar dapibus leo.
Title 6
Lorem ipsum dolor sit amet, consectetur adipiscing elit. Ut elit tellus, luctus nec ullamcorper mattis, pulvinar dapibus leo.
Title 7
Lorem ipsum dolor sit amet, consectetur adipiscing elit. Ut elit tellus, luctus nec ullamcorper mattis, pulvinar dapibus leo.
Title 8
Lorem ipsum dolor sit amet, consectetur adipiscing elit. Ut elit tellus, luctus nec ullamcorper mattis, pulvinar dapibus leo.
Title 9
Lorem ipsum dolor sit amet, consectetur adipiscing elit. Ut elit tellus, luctus nec ullamcorper mattis, pulvinar dapibus leo.
Title 10
Lorem ipsum dolor sit amet, consectetur adipiscing elit. Ut elit tellus, luctus nec ullamcorper mattis, pulvinar dapibus leo.
Title 11
Lorem ipsum dolor sit amet, consectetur adipiscing elit. Ut elit tellus, luctus nec ullamcorper mattis, pulvinar dapibus leo.
Other Complete Projects (that I still need to write up)
I’ve been slacking at keeping this page up to date. But here are some other projects we’ve completed that still need write-ups:
- LED under-lighting on frame and stairs (with magnets), and switch –
- LED strip lights on awning roller -, and magnetic connector –
- New cell repeater (HiBoost 10k Plus)
Miscellaneous
These aren’t really mods, but they’re useful things we’ve added to our camper….
-
- Rechargeable, dimmable reading light – This is perfect when someone in the camper wants a little light so they can see without disturbing others. It’s dimmable, produces white or orange-ish light (easier on the eyes) and is rechargeable via the plentiful USB ports.
- Dimmable, USB-powered reading light – This is a fair bit brighter than the other light. The long goose-neck makes it great for shared, indirect light over the larger bed.
- Ladder – Every once in a while you need to get on the roof, or wipe down the awning before rolling it up, or… whatever. So I found this little ladder, super light, and fits easily into either of the storage bays.
- Fridge thermometer/alarm – we run the fridge on propane quite a bit as most sites we visit don’t have power. And while we carry spare propane, I’m alway nervous that we’ll run out, the fridge will stop working, and we won’t notice until it’s too late. So I just picked up this thermometer with two remote sensors. I’m going to throw one in the fridge and one in the freezer, and set the alarms appropriately. Helpful tip someone shared, regular AA batteries don’t do well in the cold, so I grabbed some lithium AA batteries which should perform better.
- Macbook charger – I’m writing this over the summer of 2020, and I’m working 100% remotely. So why not do it from the camper?! But to do so, I still need my computer. And as we’ve mentioned, we often camp without external power. I work on a recent Macbook Pro, which charges via USB-C, and I thought any USB-C power source would work, but not the case. If there’s not enough power, the laptop won’t even try to charge, the charging system is “smart”. So I found this charger, and it works well. I did install a 12V power outlet with circuit breaker to handle the high power draw. Between this, the solar suitcase, and the cell booster, I should be able work from just about anywhere.
- Water filter/pitcher – This water pitcher makes a big difference when you’re drinking water that has been in the holding tank for a few days. With its built-in filter, it makes a noticeable difference.
- Coleman screen house – The bugs love me. And James. We step out of the car when we get to a camp site (often around dusk), and the first thing we have to do is apply bug spray, or they chow on us. Interestingly, they don’t seem to bother Maddox much (too bitter?). Anyway… in addition to being extra-tasty to mosquitos, we also often camp near water. So, we’re always prepared with bug spray, and this screen tent. We had a cheaper, lighter one, but it required a lot of guy lines and still collapsed every time it got a bit windy. Once I realized we’d almost always be camping with the camper, I stopped worrying about weight, and I found one that was stable, and quick/easy to set up. It wasn’t cheap, at almost $200, but its already lasted more than twice as long as the previous one (4 seasons), and it’s still in great shape. It’s really easy to set up, except that it’s pretty heavy. When it’s all packed into its bag, it’s just over 50lbs. This is because of the sturdy metal folding frame. So, I’d never use this if I had to carry it very far, but it’s perfect to set up over a picnic table next to the trailer if we’re expecting rain (yes, the roof blocks the rain) or if it’s a buggy area.
- Key holder – Mounted by the door to keep me from losing my keys (which I do a lot).
- Variable thermistor for Dometic fridges – our fridge would occasionally run too cold, things in the fridge would freeze. I moved the built-in thermistor around (the way you “adjust the temp in our fridge) with little effect. So I searched around and found this adjustable thermistor. It plugged right into the existing contol board on our fridge, and it works great.
- Projector alarm clock – At home we have a projector alarm clock that I love. So, when I found one that effectively runs on 12vdc, I got it for the camper.
- Surge protector – We don’t connect to electric hook-ups a lot, but we had one long trip in 2024 where we did, and I heard enough horror stories about surges frying campers that I bought this one. So far, so good.
- Replaced the water pump – I’m still not sure why, but our water pump died. Maybe I didn’t drain it well enough? So, I replaced it… same model as the original, super-easy install.
- Bathroom hooks – there was no convenient place to hang towels in the bathroom, and there was no place to hang jackets and sweatshits, so we got 4 of these hooks to hand on the bathroom door (two face into the bathroom for towels, and two out for jackets and hoodies).
- Replaced the thermostat – We don’t use the heat much, but the few times we had it was clear the OEM thermostat was junks. The original one was and old-school mechanical one, and it took forever to register a change in temperature, which means it wouldn’t shut the heat off in a timely manner. I found this thermostat on Amazon. Its cheap, digital, relatively small, and it does the job. One downside over the original is that it does take batteries.
- Flip-up jack foot – I saw an ad for this, and sort of bought it on a whim. It added a few inches in height to the factory jack foot, and the foot is quite a bit larger. These mean I almost never need a block or a piece of wood under the jack foot. It also means the jack doesn’t need to go as far up/down, which means it quicker to hitch and unhitch.
- Weight distribution/sway-control hitch – While our camper is well within the towing capacity of our tow vehicle (2021 Jeep Grand Cherokee), it was still not the smoothest tow. I read up on weight-distribution and sway-control hitches, and we ended up with this one. Several things led me to this one:
– Capacity, 6,000 lbs works for our camper, and gives us a bit of room to “grow”.
– Price (this was < $500 when we bought it)
– This design has no backing up or turning restrictions
– It was available in a trunion bar (vs round bar) model, which provides a bit more ground clearance. - Bluetooth level, and leveling blocks – Without a doubt, parking and setting up the camper when getting to a new site is the most stressful part of a trip. So, I’m always looking for ways to make it easier. I have a simple level on the tongue, and another inside the camper, and step blocks (the “lego” style) to level it. But it was a lot of trial and error, getting in and out of the two vehicle, and just a lot of back and forth. So, I found this bluetooth level, which allows you to see when its level from your phone (in the tow vehicle), and these gradual, drive-on leveling blocks. With these, I just need to put the blocks in place, bring up the app for the level on my phone, and pull forward or back until its level.
The level is great. Its very easy to set up. Its small and easy to mount anywhere. And, it shuts itself off, which means the battery will last a long time. The app lets you see how far you are from level, both left-to-right, and front-to-back. And it shows this in inches which helps to determine how much more you need to raise a side or an end.
The blocks are also very easy to use. Its effectively just a curved wedge, and you drive up on them for more height. They come in sets of two, presumably for dual-axle trailers, which means I had an extra one that I gave to a buddy.
Together, these two items make leveling quick and painless. - New tires and rims – On a trip home from a campsite in 2023 one of the camper tires blew out. I had a car full of kids and I was on the highway, so there was plenty of noise. I didn’t hear the tire go, or the noise from it dragging after the blowout. I was able to change it and get home safely, but the tire and rim were trashed. The rim on the spare didn’t match the remaining rim, so I decided to buy a new pair, I ended up with these Kenda Karrier tires and rims from etrailer. As of the time I’m writing this, I’ve got one full season on these tires & rims, and no complaints.
- Tire pressure monitor and repeater – As I mentioned, I had a blowout on the highway in 2023, and I didn’t notice it right away. Fortunately, the only damage was a tire and rim. But I wasn’t happy about the fact that I didn’t realize right away that a tire was gone. So I looked into (cheap) tire monitors. The first one bought was intended for use with 4 sensors, and the display couldn’t be put in “2-wheel” mode, so I returned it, and got this one instead. And, it seems to work, but you get what you pay for. Its impossible to tell how “real-time” the data on the display is. There’s no indicator when the display is getting data from the sensor. So, I did some testing… when I remove the sensor (a replacement cap for the air valve on a tire), the display “notices” right away, raises an alarm, and displays a pressure of 0 (zero). This simulates a blow out, so I was pretty happy about that. But I also wanted to test the range between the sensors and the display, so I unhooked the camper, turned on the display in the tow vehicle, and drove away. The display never acknowledged that it lost contact with the sensors (and there’s no way they were still in contact, I drove over a mile away). So, if I lose a sensor while on the road, the TPMS will never tell me. It also leaves a little doubt about the overall quality, and reliability.

